• Glow, Layer, Roll: Prep Your Bike for Late-Summer and Early-Fall Rides

    Late summer cycling can sneak up on you—one day it’s warm and bright, the next you’re dodging early fall chills and wet roads. If your bike’s still dressed for July, you’re missing out on smoother, safer rides as the seasons shift. Let’s get your gear glow-ready with lights, layers, and fresh tires, plus a quick Wheel Sports tune-up to roll through early fall rides without a hitch. Ready to shop and ride?

    Ready Your Ride: Late Summer Cycling Prep

    As the weather changes, getting your bike ready is crucial for enjoying those late summer rides. Let’s dive into the essentials that will keep you pedaling smoothly and safely.

    Lights On: Cycling Lights & Visibility

    Seeing and being seen is vital on the road. Invest in bright front and rear lights to make sure you stand out to drivers and other cyclists. Choose lights with adjustable settings: brighter for daylight visibility, dimmer for evening rides. Battery life matters too, so look for ones that last several hours or offer easy recharging. Don’t forget side visibility; adding wheel lights or reflective strips can make a big difference during dull weather or low-light conditions.

    Layer Up: Fall Cycling Gear Guide

    Stay cozy as temperatures drop. Start with a breathable base layer to wick away sweat. Add a windproof jacket for those chilly breezes. Consider long sleeves or arm warmers for flexible layering. Full-finger gloves and a neck buff will keep extremities comfy. Don’t forget about your feet: thicker socks or shoe covers can prevent cold toes. Dressing smartly means you can peel off layers as you warm up, adapting to the weather as it changes.

    Smooth Roll: Bike Maintenance Checklist

    A well-maintained bike is your best friend. Check your brakes: worn pads can be dangerous, especially in wet conditions. Lubricate your chain to prevent rust and ensure smooth shifting. Tighten any loose bolts and inspect cables for wear. Regular maintenance prevents minor issues from becoming major problems. This way, you can enjoy longer rides without interruptions.

    Must-Have Upgrades for Early Fall Rides

    Want to enhance your cycling experience? Upgrading your gear can make a world of difference.

    Tire Talk: Puncture Protection & Grip

    Choose tires with thicker tread for better grip on slippery roads. Puncture-resistant tires reduce the chance of flat tires, saving you from roadside repairs. Wider tires offer more stability on wet surfaces, boosting your confidence. Check the tire pressure regularly; it should be within the recommended range for optimal performance.

    Stay Dry: Bike Fenders & Wet Weather Cycling

    Fenders are a game-changer in wet weather, keeping mud and water off your clothes. Full-length fenders offer the best protection. Combine them with water-repellent gear to stay dry. A rain jacket and pants can keep you comfortable during unexpected showers. Investing in quality waterproof gear ensures you won’t have to cut your ride short when the rain starts.

    Safety First: Reflective Cycling Gear & More

    Reflective gear enhances visibility even on the gloomiest days. Opt for jackets and accessories with reflective elements. Reflective tape on your bike frame or helmet can be a lifesaver. Consider adding a reflective vest to your kit. These simple additions can significantly improve your safety by making you more visible to others.

    Book Your Tune-Up: Wheel Sports Services

    Keep your ride in top shape with a professional tune-up. It’s time to pay attention to the details that matter.

    Tune-Up Time: Road, Mountain, and Gravel Bike Prep

    Every bike type deserves special care. Whether you ride on roads, trails, or gravel paths, ensure your bike is ready. A basic tune-up includes brake adjustments, gear shifting checks, and overall inspection. Regular servicing keeps wear and tear at bay, extending your bike’s lifespan.

    Chain Care: Lube & Tubeless Sealant Essentials

    A well-lubricated chain is key to smooth rides. Use a chain lube suited to the current weather conditions. Tubeless sealant is a must for preventing flats on tricky terrain. Apply it before heading out, and remember to top it up regularly for the best results.

    Custom Fit: E-Bike Health Checks & More

    E-bikes require special attention. Make sure your battery is fully charged and functioning properly. Inspect the motor and connections for signs of wear. A custom fit ensures you’re riding comfortably and efficiently, making each ride enjoyable and effective.

    Frequently Asked Questions

    1. How do I choose the right cycling lights?
      Look for lights with adjustable brightness and long battery life. Ensure they have options for both front and rear visibility. Features like side visibility can also enhance your safety.

    2. What’s the best way to layer cycling clothes?
      Start with a moisture-wicking base layer, add a windproof outer layer, and include accessories like gloves and a neck buff. This allows you to adjust as temperatures change.

    3. Why are puncture-resistant tires important?
      They help prevent flats, saving you from interruptions during rides. Thicker tread offers better grip on slippery surfaces, enhancing safety and performance.

    4. What maintenance should I regularly perform on my bike?
      Regular checks include brake pad inspection, chain lubrication, and ensuring all bolts are tight. This keeps your bike running smoothly and prevents bigger issues.

    5. How can I improve my visibility during rides?
      Use reflective gear and accessories. Attach reflective strips to your bike and wear items with reflective elements to increase your visibility to others.

  • Meet Your New Favorite Motorcycle Chain Cleaner

    Think all chain cleaners are the same? Think again. Your motorcycle’s chain faces grime and gunk that lazy cleaners just can’t handle. Meet the motorcycle chain cleaner that’s fast, safe on O-, X-, and Z-rings, and leaves zero residue—perfect for quick at-home maintenance. Stick around to see why pros choose this cleaner and how it can make your chain sparkle in no time.

    For tips on keeping your bike chain squeak-free, don’t miss our handy guide. Want to boost your bike’s speed with the right lube? Check out this expert advice.

    Ready to make the switch? Visit Wheel Sports today for our unbeatable bundle deals! 🧼🏍️

    Why a Pro-Grade Cleaner Matters

    Upgrading your chain cleaner can protect your bike and improve its performance. But why should you choose a pro-grade cleaner over the rest? Let’s dive into the benefits of using a top-tier product.

    Protect Your Bike’s Parts

    Using the right cleaner helps keep your bike parts in great shape. A cleaner that’s gentle yet effective prevents damage to O-rings, X-rings, and Z-rings. When grime builds up, it can wear down these parts, leading to expensive repairs. With a pro-grade cleaner, you’re safeguarding your bike against unnecessary wear and tear. By choosing wisely, you ensure that your motorcycle stays smooth and reliable for every ride.

    Fast and Effective Cleaning

    No one wants to spend hours scrubbing away stubborn dirt. A pro-grade cleaner works quickly, cutting through grime like a hot knife through butter. This means less time cleaning and more time riding. Most cleaners require multiple applications, but with our recommended product, a single application often does the trick. You’ll be amazed by how fast and effectively it restores your chain to its original shine.

    Eco-Friendly and Safe

    Your bike deserves a cleaner that’s tough on dirt but kind to the planet. Many pro-grade cleaners are biodegradable, making them safe for the environment. You can clean your chain without worrying about harmful chemicals seeping into nature. Plus, these cleaners are safe for you, too—no harsh fumes or residue to deal with. Enjoy a cleaner bike and a cleaner conscience.

    Simple and Quick Chain Cleaning

    Cleaning your chain doesn’t have to be a complicated chore. With the right cleaner, the process becomes straightforward and efficient. Let’s break down how you can get your chain sparkling in no time.

    How It Works: Quick Steps

    Cleaning your chain is as easy as one, two, three. First, spray the cleaner evenly across the chain. Second, let it sit for a few minutes to break down the dirt. Finally, wipe it off with a clean cloth. Voila! Your chain will look as good as new. No need to spend hours scrubbing; these steps will have you back on the road fast.

    Safe and Gentle on All Chains

    Whether you have an O-ring, X-ring, or Z-ring chain, our cleaner is safe for all types. It’s formulated to avoid any damage while providing a thorough clean. Delicate rings require special care, and this cleaner delivers just that. Enjoy peace of mind knowing your bike’s components are protected throughout the cleaning process.

    No Residue, Just Shine

    Say goodbye to sticky residue that attracts more dirt. The best motorcycle chain cleaner leaves no trace behind, just a brilliant shine. This means your chain stays cleaner for longer, reducing the frequency of cleanings. You’ll appreciate the lasting cleanliness every time you gear up for a ride.

    Get the Complete Chain Care Kit

    Why settle for just a cleaner when you can have an entire kit for your chain’s needs? Investing in a complete care kit offers more value and convenience.

    Bundle Up for Savings

    Purchasing a chain care kit is a smart way to save money while getting everything you need. Kits often include a cleaner, a brush, and lube, offering a comprehensive solution. This all-in-one approach ensures you have the right tools for every step of chain maintenance. By bundling, you save money and time—no more hunting for individual products.

    Grab the 3-Sided Brush and Lube

    The 3-sided brush is a game-changer for reaching every nook and cranny of your chain. Paired with a high-quality lube, it ensures your chain runs smoothly and lasts longer. These tools make maintenance a breeze, enhancing your bike’s performance. The brush’s unique design means even the toughest grime doesn’t stand a chance.

    Ready for a Smoother Ride? 🏁

    A clean chain is key to a smooth, enjoyable ride. With the right products, you’ll notice an immediate difference in how your bike feels and performs. Don’t wait until your chain is caked with dirt—start enjoying a smoother ride today!

    Frequently Asked Questions

    What makes a motorcycle chain cleaner O-ring safe?

    A motorcycle chain cleaner is O-ring safe if it’s formulated to clean without causing damage to the rubber rings that seal the chain’s inner components. It should be gentle yet effective, ensuring the integrity of the seals.

    How often should I clean my motorcycle chain?

    You should clean your motorcycle chain every 300-600 miles, or whenever you notice it’s getting dirty. Regular cleaning helps maintain optimal performance and prolongs the life of your chain.

    Can I use regular degreasers on my motorcycle chain?

    It’s best to use a cleaner specifically designed for motorcycle chains. Regular degreasers might be too harsh and could damage the rubber seals, leading to premature wear.

    Do chain care kits provide better value than individual purchases?

    Yes, chain care kits typically offer better value. They bundle essential tools like cleaners, brushes, and lubes, which are often discounted compared to buying them separately.

    Is a biodegradable chain degreaser effective?

    Absolutely, biodegradable chain degreasers are both effective and environmentally friendly. They cut through grime without harming the planet, making them a smart choice for eco-conscious riders.

  • Motorcycle Stand Guide + Smart Bike Stand Picks from Wheel Sports

    Most bike stands make a lot of noise when you try to pick the right one. But your motorcycle deserves a stand that’s tough, steady, and easy to use. Whether you want a paddock stand for quick maintenance or a garage stand that tucks away neatly, we’ve got picks that fit your ride and your space. Ready to steady your ride? Add a stand to your cart now.

    For those who need tips on how to keep their ride squeaky clean, check out our guide on How to Clean Bike Chain. And don’t forget to explore our top-notch cycling gear at Wheel Sports for all your biking needs.

    Smart Tips for Motorcycle Stands

    When it comes to keeping your motorcycle steady, choosing the right stand is key. Let’s dive into the essentials of picking the perfect motorcycle stand for your needs.

    Choose the Right Paddock Stand

    A paddock stand is your best buddy when it comes to quick bike maintenance. Whether you’re working on the front or rear, these stands make tasks like cleaning and adjustments a breeze. So, which one suits you best: a front paddock stand or a rear paddock stand? If you’re focused on chain maintenance or wheel removal, a rear paddock stand is your go-to. For front-end tasks, opt for a front paddock stand.

    It’s all about what you need. The right stand keeps your bike stable and makes maintenance way easier. Plus, it’s a great way to ensure your motorcycle is safe from tipping over while you work. Always remember: stability is crucial, and these stands deliver it brilliantly.

    Key Features to Consider

    Picking the ideal motorcycle stand involves checking a few key features. First, look for sturdy construction. Steel or alloy materials ensure your stand can handle the weight. Next, check the weight capacity. Your stand should comfortably support your bike.

    Consider the ease of use, too. Quick-lift mechanisms save you time and effort. Lastly, portability matters. If you plan on moving your stand around, make sure it’s easy to transport. These features combined ensure your stand is not only effective but also convenient to use.

    Adding a Wheel Chock for Safety

    For added safety, a wheel chock is a smart investment. These devices keep your bike from rolling when parked. They’re perfect for garages or transporting your motorcycle. A wheel chock## Smart Tips for Motorcycle Stands

    Your motorcycle deserves the best support. Let’s explore how to choose the right stand for your ride.

    Choose the Right Paddock Stand

    Picking a paddock stand can be tricky. First off, figure out if you need a front paddock stand or a rear paddock stand. The rear paddock stand is great for chain maintenance and wheel cleaning. It keeps the bike upright without leaning, which is crucial for stability. Front paddock stands, on the other hand, are ideal for front tire changes. They support the forks, making front-end maintenance a breeze. Whichever you choose, ensure it’s compatible with your bike’s size and weight. A sturdy paddock stand means safer maintenance and peace of mind.

    Key Features to Consider

    When shopping, focus on a stand’s material and construction. Steel stands are durable and can handle heavier bikes, while aluminum ones are lighter and easier to move. Look for rubberized grips on the arms to prevent scratches on your bike. Adjustable arms are a plus, accommodating different bike sizes. A good stand should also have wheels to maneuver easily. Remember, a stand that fits your bike perfectly ensures a safe and steady hold during maintenance.

    Adding a Wheel Chock for Safety

    A wheel chock secures your bike, preventing it from rolling or tipping over. It’s a must-have if you work on your bike in a garage. Place the wheel chock under the front wheel for added stability during repairs. Look for chocks with adjustable widths to fit various tire sizes. Some models even bolt to the floor for ultimate security. With a wheel chock, you can focus on maintenance without worrying about balance.

    Best Bike Repair and Storage Stands

    Let’s dive into the best stands that make bike maintenance and storage a breeze.

    Pro Bike Repair Stand Highlights

    A pro bike repair stand elevates your bike, making repairs comfortable. Look for a model with adjustable height for easy access to all parts of your bike. The clamp should rotate, allowing you to work from any angle. Quick-release clamps make securing and removing your bike hassle-free. A sturdy tripod base ensures stability on uneven surfaces. With the right repair stand, you’ll breeze through maintenance tasks like a pro.

    Floor Storage Stand Benefits

    Floor storage stands are perfect for keeping your bike upright and out of the way. They’re great for home bike maintenance, offering a simple way to store bikes without wall mounts. These stands hold the rear wheel, making them easy to use. Look for models with rubber feet to prevent slipping and protect your floor. A good floor stand will save space and keep your garage tidy.

    Why a Wall-Mount Rack Rocks

    Wall-mount racks free up floor space, perfect for tight garages. They hold bikes securely against the wall, preventing clutter. Choose a rack with a sturdy bracket to handle your bike’s weight. Some models fold flat when not in use, saving more space. With a wall-mount rack, you’ll keep your garage organized while protecting your bike from damage.

    Perfecting Your Garage Setup

    Transform your garage into a bike lover’s paradise with these easy tips.

    Quick Buying Tips for Cyclists

    When shopping for stands, always check weight limits and compatibility with your bike. Consider your garage space and how often you perform maintenance. Portable stands are great for those who work on bikes frequently. If you’re short on space, a wall-mount rack is your best bet. Take measurements before buying to ensure a perfect fit.

    Engage with Wheel Sports Perks

    At Wheel Sports, we offer more than just great products. We’re a community of enthusiasts ready to support your cycling journey. Join our loyalty program for discounts and exclusive deals. Participate in our workshops to learn more about bike maintenance and upgrades. At Wheel Sports, we make cycling fun and engaging.

    Ready to Steady Your Ride? 🏍️🚴‍♂️

    Now that you know what to look for, it’s time to secure your ride. Whether you need a motorcycle maintenance stand or a bike storage stand, we’ve got you covered. Don’t wait any longer to enhance your garage setup. Steady your ride with the perfect stand today.

    Frequently Asked Questions

    What is a paddock stand used for?
    A paddock stand is used to keep a motorcycle upright and stable during maintenance tasks like wheel removal or chain adjustments. It provides easy access to parts of the bike without the risk of tipping over.

    How does a wheel chock work?
    A wheel chock stabilizes a bike by locking the front wheel in place, preventing it from rolling or tipping. It’s particularly useful in garages for added security during repairs or storage.

    Are wall-mount racks safe for heavy bikes?
    Yes, wall-mount racks are designed to hold heavy bikes securely. Ensure the rack is installed into wall studs and can handle the weight of your bike to prevent any accidents.

    Do I need a special stand for bike repair?
    While not mandatory, a bike repair stand makes maintenance easier by elevating the bike and providing 360-degree access. It’s especially useful for frequent repairs or adjustments.

    Can I use a floor storage stand outdoors?
    Floor storage stands can be used outdoors, but it’s essential to ensure they are weather-resistant to prevent rust and corrosion. Look for stands made from durable materials if you plan to use them outside.

  • Bye, Squeak. Hi, Speed: Your Guide to Bike Chain Lube

    Your bike chain sounds like a rock band on tour—squeaky and worn out. That noise? It’s your chain begging for the right bike chain lube. Choosing between wet vs dry lube or trying out ceramic chain lube can feel like a puzzle, but we’ve got the cheat sheet to keep your ride smooth and quiet. Ready to silence that squeak? Pick your lube, add to cart, and ride smoother today.

    For a squeak-free ride, it’s crucial to clean your bike chain before applying any lube. Looking to stock up on essentials? Head over to Wheel Sports for all your cycling accessories. 🚴‍♂️✨

    Choosing the Right Bike Chain Lube

    Picking the ideal bike chain lube is like finding the perfect playlist for your ride. It gets the job done and keeps things running smoothly. Let’s explore the different types of lubes and how they fit your cycling needs.

    Wet vs Dry Lube Explained

    Wet lubes are perfect for rainy days or muddy trails. They stick to your chain, protecting it from water and grime. This protection makes them a go-to choice for mountain bikers. But remember, they can attract dirt, so regular cleaning is essential.

    Dry lubes, on the other hand, are best for dry, dusty conditions. They leave a thin, waxy layer that repels dirt and keeps your drivetrain clean. If you’re a road cyclist, dry lube is your friend. It lasts longer in clean conditions and needs less frequent applications.

    Ceramic and Wax Chain Lube

    Ceramic lubes are the premium choice for those wanting a super smooth ride. They contain tiny ceramic particles that reduce friction, making your pedaling more efficient. Cyclists looking for performance boosts should give ceramic lubes a go.

    Wax lubes are gaining popularity for being clean and quiet. They leave a dry layer on the chain, minimizing dirt build-up. This makes them perfect for those who prefer less mess. Want to extend your chain’s life? Wax lube is your ticket.

    E-Bike Chain Lube Options

    E-bikes need special care due to their higher power output. E-bike lubes are designed to handle more torque and pressure. They ensure your chain stays strong, even with the extra power. If you’re cruising on an e-bike, make sure to choose a lube made for the job.

    How to Lube a Bike Chain

    Now that you know what type of lube suits your ride, let’s dive into the application process. Properly lubing your chain ensures a quiet and smooth journey.

    Step-by-Step Lube Application

    1. Clean the Chain: Remove dirt and old lube using a bike degreaser.

    2. Dry the Chain: Ensure it’s completely dry to prevent rust.

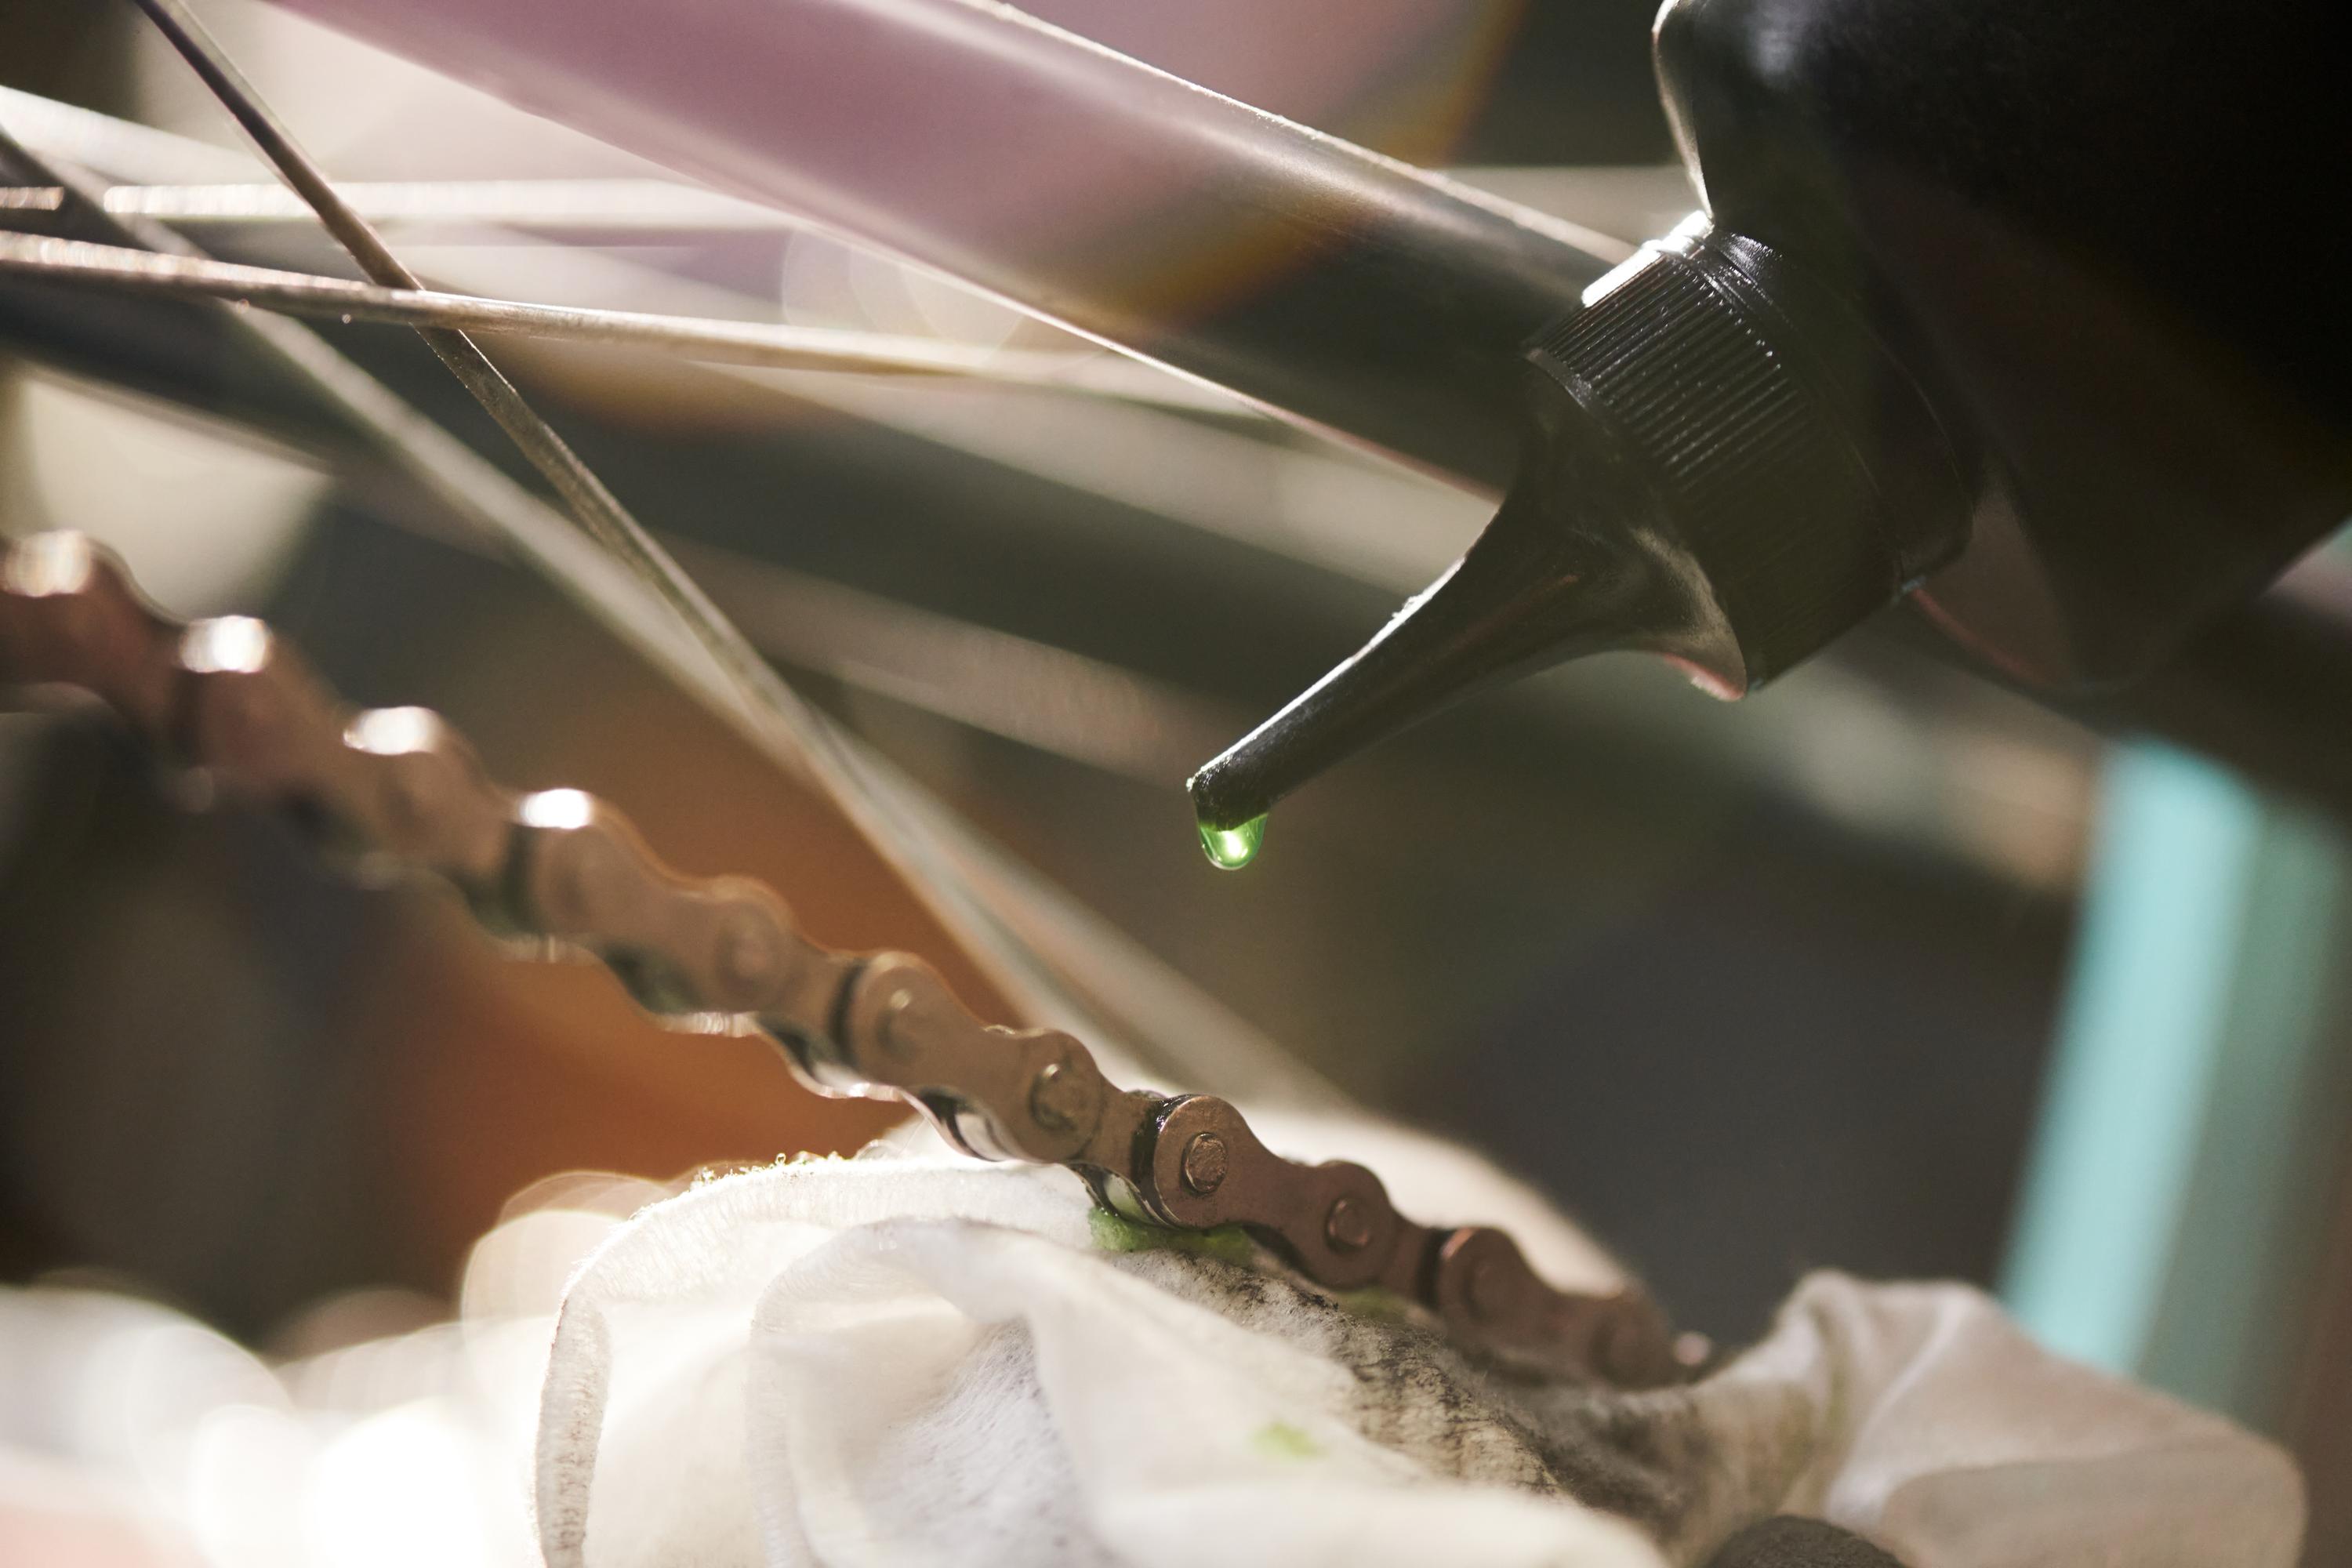
    3. Apply Lube: Drip the lube onto the chain, one drop per link.

    4. Spin the Pedals: Rotate the pedals backward to distribute lube evenly.

    5. Wipe Excess: Use a cloth to remove any extra lube.

    Essential Chain Cleaning Kits

    Maintaining a clean chain prolongs its life. A good chain cleaning kit includes a degreaser, brushes, and a lint-free cloth. Investing in a quality kit saves you time and effort, keeping your bike in top shape.

    Drivetrain Maintenance Tips

    Maintaining your drivetrain is key to a smooth ride. Let’s uncover secrets for a quiet chain and tips for different terrains.

    Quiet Bike Chain Secrets

    A well-lubed chain is a quiet chain. Regular lubing and cleaning prevent noise and wear. Remember, the longer you wait, the noisier it gets. Stay ahead with routine maintenance.

    Road, MTB, and Gravel Bike Care

    Different bikes, different needs. Road bikes benefit from lightweight lubes for speed. Mountain bikes need heavier lubes to withstand tough conditions. Gravel bikes require a balance, handling both dirt and road.

    Frequently Asked Questions

    What is the best bike chain lube for rainy conditions?
    Wet lubes are ideal for rainy and muddy conditions. They provide excellent protection against moisture and grime.

    How often should I lube my bike chain?
    Lubing frequency depends on your riding conditions. Regular riders should lube every 100-150 miles. Mountain bikers may need to lube more often due to dirt exposure.

    Can I use regular oil on my bike chain?
    It’s not recommended. Regular oils can attract more dirt and grime, causing wear. Stick to bike-specific lubes for the best results.

    How do I know when my chain needs cleaning?
    Listen for noise. If your chain starts squeaking or feels gritty, it’s time for a clean.

    Why does my chain keep rusting?
    Rust can occur if a chain isn’t dried properly after cleaning or if it’s not lubed regularly. Ensure your chain is dry and well-lubed to prevent rust.

  • Buy Less, Ride More: Choose Cycling Gear You Will Actually Use

    You’ve got a closet full of cycling gear, yet somehow the one thing you actually need never made it in. Buying gear that matches your real ride style isn’t about grabbing the flashiest stuff—it’s about picking the essentials that keep you rolling. Ready to cut the clutter and fill your cart with gear you’ll actually use? Let’s match your ride style with the right cycling gear and get you out on the road faster. Check out more tips here.

    Match Your Ride Style

    Matching your cycling gear to your ride style is the secret to enjoying every trip. Let’s dive into the gear that best suits the type of rides you love.

    Road Warriors Unite

    If you love the speed and thrill of the open road, you’re a road warrior at heart. Road biking calls for light and aerodynamic gear. A fitted jersey and padded shorts reduce air resistance and enhance comfort on long rides. Check out these tips on cycling clothes.

    Invest in lightweight shoes with stiff soles for maximum power transfer. Road-specific helmets are designed for speed, offering ample ventilation without sacrificing aerodynamics. Remember, it’s not just about speed; comfort plays a big role in performance too.

    Stay visible and safe with a bright headlight and rear light. Road biking often means sharing space with vehicles, so making yourself seen is crucial. This gear will keep you both fast and safe on your road adventures.

    Gravel Adventures Await

    Gravel riding is all about versatility and taking on different terrains. You’ll need gear that can handle rough surfaces and keep you comfy over long distances. A durable jersey and shorts made from breathable materials are your best friends here. Join the conversation about biking clothes on Reddit.

    Consider wider tires for better grip on loose surfaces. Tubeless tires can be a great choice, as they reduce the risk of flats. A gravel-specific helmet offers a balance of protection and ventilation. Invest in a hydration pack to stay fueled during long adventures.

    Don’t forget tools for unexpected challenges. A multi-tool and a portable pump will keep you moving if things go awry. Adventure awaits, and with the right gear, you’re ready for it.

    Mountain Trail Essentials

    Mountain biking is all about tackling rugged trails and steep descents. This requires sturdy gear designed for protection and durability. A full-face helmet offers maximum protection for downhill rides, while elbow and knee pads keep you safe from falls.

    Choose clothing that allows flexibility and breathability. Look for shorts with reinforced stitching and moisture-wicking fabrics. Gloves with good grip and padding will enhance control and comfort. Learn more about cycling gear.

    A backpack with a hydration system and room for tools is essential. Trails can be unpredictable, so carrying a spare tube and pump is wise. With this gear, you’re set to conquer any mountain trail.

    Gear Up the Smart Way

    Choosing the right gear is just the start. Let’s get the details right so you can ride with confidence and comfort.

    Helmet Fit Guide

    A well-fitted helmet is crucial for safety. Start by measuring your head circumference to find the right size. The helmet should sit level on your head, covering your forehead without obstructing vision. Adjust the straps so they form a V shape under your ears.

    Ensure a snug fit by using the dial at the back to adjust tension. The helmet should not rock back and forth or side to side. Comfort is key, so try different brands to find what feels best for you.

    Don’t skimp on quality here. A good helmet can make a difference in safety. Remember, it’s not just about looks, but protection on every ride.

    Cycling Apparel Must-Haves

    Getting the right cycling apparel enhances performance and comfort. Start with a base layer that wicks away sweat. A cycling-specific jersey should fit snugly to reduce drag. Padded shorts are a must for long rides, preventing discomfort from saddle pressure.

    Weather can change quickly, so layer up with a windproof or waterproof jacket. Don’t forget gloves and socks for added comfort. Join our Facebook group to share your cycling tips.

    Accessories like sunglasses protect your eyes from the sun and debris. Keep your wardrobe simple but effective for all types of weather and ride conditions.

    Bike Tools and Maintenance Tips

    Maintaining your bike is essential for smooth rides. A basic tool kit should include tire levers, a mini pump, and a patch kit. Regularly check tire pressure and brake function.

    Lubricate the chain often to prevent rust and ensure smooth gear shifts. Cleaning your bike after rides removes dirt and extends its life. Invest in a stand for easy maintenance at home.

    Routine checks keep your bike in top shape, ensuring every ride is safe and enjoyable. A little care goes a long way in keeping your bike ready for any adventure.

    Add to Cart and Roll On

    Now that you’ve geared up, let’s explore services that make cycling even sweeter.

    Virtual Gear Consultation

    Wondering what gear you need? Our virtual gear consultation connects you with experts who tailor recommendations to your riding style. They guide you in choosing essentials, ensuring you have everything for your next ride.

    This personalized service brings expert advice right to your home, helping you make informed choices.

    Custom Bike Fitting Services

    A bike that fits well improves comfort and performance. Our custom bike fitting services ensure your bike is tailored to your body, reducing the risk of injury. Adjustments to saddle height, handlebar position, and more make a huge difference.

    Experience the comfort of a perfectly fitted bike, enhancing every ride. This service helps you enjoy longer rides with ease and efficiency.

    Join Wheel Rewards and Save 💡

    Join our Wheel Rewards program and enjoy exclusive discounts on your favorite gear. Save on your next purchase and gain access to members-only events. The program is designed to keep you riding without breaking the bank.

    Don’t miss out on the perks that come with being part of the Wheel Sports community. Join today and let the savings roll in!

    Frequently Asked Questions

    What type of cycling gear do I need for road biking?

    For road biking, you’ll need a lightweight helmet, fitted jersey, and padded shorts. Shoes with stiff soles and bright lights for visibility are also essential.

    How can I maintain my bike at home?

    To maintain your bike at home, regularly check tire pressure and brake function. Lubricate the chain and clean the bike after rides to prevent dirt buildup.

    Why is helmet fit important?

    A well-fitted helmet provides optimal protection in case of a fall. It should sit level on your head and feel snug without moving. Adjust the straps properly for a secure fit.

    What should I wear for gravel riding?

    For gravel riding, wear a durable jersey and shorts. Use wider, tubeless tires for better grip on loose surfaces. A hydration pack is also important for long rides.

    How does custom bike fitting enhance performance?

    Custom bike fitting adjusts your bike to suit your body, improving comfort and efficiency. This reduces the risk of injury and allows for longer, more enjoyable rides.

  • Best Bike Cleaning Products: Quick Picks to Make Your Ride Shine

    Think a quick rinse is all your bike needs? Think again. Dirt, grime, and chain gunk sneak in everywhere, slowing you down and wearing parts out faster. The best bike cleaning products cut through all that nastiness, making your ride shine and last longer. Ready to know which washes, degreasers, brushes, and lubes earn top marks? Let’s get your bike sparkling in no time. https://www.bikeradar.com/advice/buyers-guides/best-bike-cleaner

    Essential Bike Cleaning Gear

    Before diving into the specific tools and products, let’s explore why a proper cleaning kit is essential. Keeping your bike clean not only makes it look good but also extends its life and improves performance. Ready to upgrade your cleaning game?

    Best Bike Cleaning Products

    Every cyclist needs a reliable set of cleaning products. You’ll want to start with a Muc-Off bike wash, known for its eco-friendly formula that dissolves dirt and grime. Many riders swear by Finish Line degreaser for its ability to cut through the toughest grease without harming your bike’s components. Grab these staples to keep your bike in top shape.

    Bike Wash Picks

    Choosing the right bike wash can make a world of difference. Look for options like biodegradable solutions that are gentle on both your bike and the environment. These washes break down mud and road grime without leaving residue. Make each wash a breeze and watch your bike sparkle.

    Chain Degreaser Essentials

    Is your chain looking grimy? A good degreaser is key. The best options remove stubborn buildup quickly, ensuring a smooth ride. Apply directly to the chain, scrub gently, and rinse off for an instant refresh. It’s the secret to a longer-lasting chain.

    Tools for a Sparkling Ride

    With the right products in hand, it’s time to talk tools. Equip yourself with a few essentials that will make cleaning easy and efficient.

    Brush Sets for Bikes

    A brush set is your best friend for reaching all those tricky spots. Look for sets with various brush sizes, ideal for scrubbing frames and getting into tight spaces. A Park Tool brush set is a popular choice among cyclists for its durability and effectiveness.

    Microfiber Cloths for Bikes

    Microfiber cloths are a must-have for any cleaning kit. They’re perfect for wiping down surfaces without scratching. Use them to dry off your bike and give it a final polish. These cloths absorb moisture quickly, leaving your bike gleaming.

    Chain Cleaning Tools

    For a pristine chain, invest in a chain cleaning tool. These gadgets are designed to fit over your chain, scrubbing it clean as you pedal. They’re easy to use and incredibly effective. Once you’ve tried one, you’ll wonder how you ever managed without it.

    Keep It Clean and Smooth

    With your bike spotless, it’s time to protect it. Use these final steps to keep everything running smoothly.

    Protectant Spray for Bikes

    A protectant spray shields your bike from dirt and moisture. Apply it after cleaning to create a protective barrier. This step not only keeps your bike looking fresh but also helps prevent rust and corrosion.

    Bike Lube Dry vs Wet

    Choosing between dry and wet lube depends on your riding conditions. Dry lube is perfect for dusty trails, while wet lube excels in wet, muddy environments. Applying the right lube can greatly enhance your riding experience.

    Ceramic Bike Lube Choices

    For top-tier performance, ceramic lubes are an excellent choice. They reduce friction and keep your drivetrain running like a dream. These lubes are long-lasting, making them a favorite for serious cyclists. Keep your ride smooth and efficient with this premium option.

    😊🚴‍♂️

    Frequently Asked Questions

    What are the best products to clean a bike?

    The best products include a quality bike wash, a reliable degreaser like Finish Line, and a protective spray. These help maintain your bike’s appearance and performance.

    How often should I clean my bike?

    It’s best to clean your bike after every few rides, especially if you’ve been through mud or rain. Regular cleaning prevents buildup and ensures a smooth ride.

    How do I choose between dry and wet bike lube?

    Choose dry lube for dry, dusty conditions and wet lube for wet, muddy environments. Using the right lube enhances your bike’s performance based on where you ride.

    What tools are needed to clean a bike?

    Essential tools include a brush set, microfiber cloths, and a chain cleaning tool. These make cleaning easy and effective, reaching all parts of your bike.

    Why is using a chain cleaning tool important?

    A chain cleaning tool simplifies the process, ensuring your chain stays free of dirt and grime. It prolongs chain life and keeps your ride smooth.

  • Bike gears not shifting? Quick fixes and gear picks to get you rolling

    Bike gears not shifting can turn a fun ride into a frustrating struggle fast. You want smooth, reliable shifts without fuss or fancy jargon. Let’s break down common bicycle shifting problems and share quick fixes plus must-have gear to get your bike shifting like new again. Ready for smooth shifts? Add your fix to cart, book a tune-up, or chat with our experts now. Check out this guide for more tips!

    Common Shifting Problems

    Before we dive into solutions, let’s identify what’s going wrong with your bike’s gears. Understanding the common issues helps you get back on track faster.

    Bike Gears Not Shifting?

    If your bike gears aren’t shifting, it might be a simple fix or something more involved. Often, it’s due to misaligned gears or a stretched cable. Imagine riding uphill but your chain won’t budge from that tough gear—it’s exhausting! The first step is to inspect your gear cables. Are they frayed or loose? Tightening them might be your quick fix. In some cases, dirt and grime clog the gear mechanisms, causing sticky shifts. A good clean might solve this. For more complex issues, here’s a detailed guide.

    Is Your Bike Won’t Shift?

    Stuck gears can spoil any ride. If your bike won’t shift, the rear derailleur might be the culprit. Check if it’s bent or clogged with dirt. A bent derailleur can cause the chain to skip or not change at all. Cleaning and realigning it can save you from a painful ride. Also, inspect the shifter cables for any signs of wear. Sometimes, simply replacing the cables is all it takes. Can’t fix it? Explore this resource for troubleshooting more stubborn issues.

    Bicycle Shifting Problems Solved

    Resolving shifting problems can be straightforward once you pinpoint the source. Whether it’s a simple cable adjustment or a more involved derailleur fix, knowing where to look is key. Investing in a quality cable and housing kit can work wonders for your shifting performance. And if DIY isn’t your thing, booking a professional tune-up ensures everything is in top shape. Here’s a helpful diagnostic tool to fine-tune your gears.

    Essential Gear for Smooth Shifting

    Now that you know what might be causing the issues, let’s explore the gear that keeps your bike shifting smoothly. From must-have accessories to alignment tips, these are essentials for every cyclist.

    Must-Have Cycling Accessories

    Having the right accessories can make a world of difference in your cycling experience. A reliable chain lube keeps your chain running smoothly, reducing friction and wear. Investing in a quality cable and housing kit ensures crisp gear changes. These simple additions can prolong the life of your bike’s components. Don’t forget a multi-tool; it’s handy for on-the-fly adjustments. Want more ideas? Check out our cycling accessories.

    Shifter Cable Stretch Solutions

    Cable stretch is a sneaky culprit behind poor shifting. Over time, your bike’s cables can loosen, resulting in sluggish gear changes. The fix is often as simple as tightening the barrel adjuster located near your shifters. A small tweak can make a significant difference. For stubborn cable issues, consider replacing them. Fresh cables provide a smoother ride, especially if yours look worn. If you’re unsure, our experts can guide you through the process.

    Derailleur Hanger Alignment Tips

    A misaligned derailleur hanger can wreak havoc on your shifting. If your bike frequently skips gears or won’t shift at all, this might be the problem. Start by visually inspecting the hanger; if it’s bent, straighten it carefully. You might need a derailleur hanger alignment tool for precision. Properly aligned hangers ensure accurate gear changes and prolong the life of your derailleur. Need help? Our mechanics are ready to assist you.

    Quick Fixes and Pro Services

    Sometimes, quick fixes aren’t enough, and professional help is needed. Here’s how you can address minor issues yourself and when to consider professional services.

    DIY Barrel Adjuster Tips

    Tuning your barrel adjuster can be a lifesaver. This tiny component controls the tension of your gear cables. When your bike shifts poorly, try turning the adjuster clockwise or counter-clockwise in small increments. Test the shifting after each adjustment. With a bit of patience, you can achieve the perfect tension for smooth gear transitions. Not sure where to start? Our team is here to offer guidance.

    When to Book a Bike Tune-Up Service

    Your bike deserves regular check-ups, just like you do! Routine tune-ups catch issues before they become costly repairs. If DIY adjustments aren’t clearing up the problem, it might be time to book a professional tune-up. A full service includes checking the cables, chain, derailleur, and even the brakes. This keeps your bike in peak condition and ensures a safe ride. Don’t delay, especially if you ride often or in harsh conditions.

    Find Bike Repair Near Me 🚴‍♂️🔧

    Not confident in fixing your bike yourself? Finding a local repair shop is easy. Search for “bike repair near me” to find skilled technicians who can help. They can handle everything from minor tweaks to major overhauls. A good repair shop offers peace of mind and keeps you rolling smoothly. Want recommendations? Our network of trusted shops is ready to assist you.

    Frequently Asked Questions

    Why won’t my bike shift gears?
    Your bike may not shift gears due to misaligned derailleurs, stretched cables, or dirt blocking the components. Start by checking the cables and cleaning your drivetrain for a smoother shift.

    How do I fix a skipping chain?
    A skipping chain is often due to a worn-out chain or cassette. Check for wear and replace if necessary. Proper derailleur adjustment can also prevent skipping.

    What tools do I need for basic bike maintenance?
    For basic maintenance, keep a multi-tool, chain lube, and a pump handy. These tools help with on-the-go adjustments and regular upkeep.

    How often should I get a bike tune-up?
    Regular tune-ups are recommended every 6 months, or more frequently if you ride often. This ensures all components are in good working condition and prevents major issues.

    Can I fix gear issues myself, or do I need a professional?
    Simple adjustments can be done at home, but complex issues might require professional help. If unsure, it’s best to consult a bike mechanic.

  • Stop Right There: How to Adjust Your Bike Brakes Fast

    Your brakes are screaming for attention, and that annoying squeak won’t quit. You’re stuck wondering how to adjust bike brakes without turning your ride into a noise machine or a safety hazard. Stick around—this quick guide will get your rim and mechanical disc brakes feeling smooth and stopping sharp in no time. Got five minutes? Let’s fix those brakes and get you rolling safer today! For a step-by-step guide, check out this resource.

    Quick Rim Brake Adjustments

    Ready to make your bike stops smooth? Start with rim brakes. They’re the most common type and often need just a few tweaks to work perfectly.

    Brake Pad Alignment Tips

    First, let’s tackle those brake pads. If they’re off, stopping can feel like a gamble.

    1. Check the Position: Look at the brake pads’ alignment with the rim. They should touch the rim evenly, not the tire or hang over the edge. If they’re misaligned, loosen the bolt holding them with an allen wrench, adjust, then tighten again.

    2. Listen for Rubs: Spin the wheel and listen. If you hear rubbing, the pads might be too close. Adjust them slightly, ensuring they still contact the rim fully when the brake is engaged.

    3. Angle Matters: Make sure the front and rear of the pad contact simultaneously. A slight toe-in can help reduce squeaks. To achieve this, have the front of the pad touch the rim just a bit before the rear.

    Adjusting Brake Cable Tension

    Next up: cable tension. This can make or break your braking experience.

    1. Feel the Lever: Squeeze the brake lever. If it feels spongy, you probably need to tighten the cable. Locate the barrel adjuster on the brake lever or caliper.

    2. Twist and Test: Turn the barrel adjuster counterclockwise to tighten. Test the brake lever after each small adjustment until it feels firm but not too tight.

    3. Lock It In: Once the tension feels right, lock the adjuster in place if your model has a locknut.

    Feeling the difference already? Perfect! Your rim brakes are now in top shape, ready for any ride.

    Mechanical Disc Brake Tweaks

    Mechanical disc brakes are a bit different but can be just as easy to adjust with the right steps.

    Fixing Squeaky Brakes

    Squeaky brakes are more than just annoying; they can signal an issue.

    1. Cleanliness Counts: Clean the rotors with rubbing alcohol and a clean cloth. This removes any grease or dirt causing the noise.

    2. Pad Condition: Check your brake pads. If they’re glazed or worn, it’s time to replace them. Be sure they’re properly aligned with the rotor to ensure effective braking.

    3. Break-In Process: If you’ve recently replaced the pads, follow a break-in process. This usually means repeated gentle stops to allow the pads to wear evenly.

    Solving Brake Rotor Rub

    Rotor rub can happen if things aren’t perfectly aligned. Here’s how to fix it:

    1. Check Rotor Alignment: Spin the wheel and watch the rotor. If it wobbles, it may need truing. A rotor truing tool can help straighten minor bends.

    2. Caliper Adjustment: Loosen the caliper bolts, squeeze the brake lever, and then retighten the bolts. This centers the caliper over the rotor.

    3. Test and Repeat: Test ride and listen. If rubbing persists, repeat the process, making finer adjustments each time.

    Final Touches for Perfect Stops

    Almost done! A few more tweaks will ensure your brakes feel just right.

    Perfecting Brake Lever Feel

    Brake lever feel can be personalized:

    1. Reach Adjustment: Many levers have a reach adjustment screw. Turning this screw will move the lever closer or further from the handlebar, allowing you to customize the feel.

    2. Consistency Is Key: Ensure both levers have a similar feel to maintain consistent braking.

    3. Test Ride: Go for a short ride and test the brakes. Fine-tune as needed for a smooth, confident stop every time.

    Must-Have Bike Maintenance Tools 🚴‍♂️

    Keeping your brakes in top form requires the right tools:

    • Allen Wrenches: Essential for most brake adjustments.

    • Rotor Truing Tool: Handy for fixing wobbly rotors.

    • Rubbing Alcohol and Cloth: Keeps your rotors clean.

    • Cable Cutters: Necessary for cutting brake cable to size.

    Having these tools on hand will make your bike brake adjustments a breeze, ensuring a safe and smooth ride every time.

    Frequently Asked Questions

    How do I know if my bike brakes need adjusting?

    If your brakes feel loose, make noise, or don’t stop you quickly, it’s time for an adjustment. Regular checks can prevent bigger issues.

    Can I adjust my brakes without any tools?

    Some minor tweaks can be done by hand, but having basic tools like an allen wrench makes the process much easier and more precise.

    What if my brakes are still not working properly after adjusting?

    If problems persist, consider consulting a professional. There might be underlying issues needing expert attention.

    How often should I check my bike brakes?

    Regularly inspect your brakes every few rides or at least once a month, especially if you cycle frequently or in varied conditions.

    What’s the difference between mechanical and hydraulic disc brakes?

    Mechanical brakes use cables, while hydraulic systems use fluid for activation. Hydraulics tend to offer smoother and more powerful braking.

  • Ride Your Way: Choose Cycling Gear You’ll Actually Use

    You’ve got a bike, but does your gear really match your ride? Picking stuff you never use is like carrying a toolbox to a coffee shop—heavy and pointless. This cycling gear guide helps you spot your true ride style, so you only grab what counts. Ready to skip the clutter and shop smart? Let’s get your essentials lined up and your cart ready to roll.

    Identify Your Ride Style

    Figuring out your cycling personality is the first step to selecting gear you’ll actually use. Whether you’re commuting, road racing, or hitting the trails, knowing your style keeps your gear choices on target.

    Commuter Cycling Essentials

    If you cycle to work or school, having the right gear can make your ride smooth and stress-free. Start with a reliable lock to keep your bike safe. A solid lock is your best friend in urban areas. Adding bike lights is crucial for safety. Lights help you see and be seen, especially in early mornings or late evenings. Don’t forget panniers or a backpack to carry your essentials without feeling weighed down. This way, you can keep your hands free and focus on the road ahead.

    Road Bike Must-Haves

    For those who love speed and smooth pavements, road biking is your game. Clipless pedals and shoes are a game-changer for efficiency and control. They connect you to the bike, making each pedal stroke count. Next, consider a lightweight hydration pack. Staying hydrated on long rides is crucial. You don’t want to stop every few miles just to quench your thirst. Lastly, a flat repair kit is a must. Flats happen, but being prepared reduces downtime and keeps you on the move.

    Mountain and Gravel Gear Picks

    Off-road adventures call for gear that’s rugged and reliable. Mountain bikes are built to handle rough terrain, but you still need the right extras. Wear protective gloves to safeguard your hands from bumps and scrapes. A GPS device can be a lifesaver when you’re navigating remote trails. It keeps you on track and helps avoid getting lost. Consider bike maintenance tools for quick fixes on the trail. This keeps your ride smooth even in challenging conditions.

    Choose Smart: Gear You’ll Use

    Choosing the right gear matters. It determines how comfortable and enjoyable your ride will be. Let’s look at the essentials you shouldn’t skip.

    Cycling Apparel Basics

    The right clothing makes a big difference in comfort and performance. Start with a good pair of padded shorts. They reduce friction and make long rides much more comfortable. Choose tops made from breathable materials to keep you cool and dry. Layers are key, especially when the weather is unpredictable. Check out this intro to cycling clothing to learn more about dressing right for your ride.

    Bike Accessories Checklist

    A well-accessorized bike is a happy bike. Start with mudguards to keep dirt and water off you and your bike. This little addition makes a big difference in wet conditions. Bike computers track your speed, distance, and more, helping you monitor your progress. Lastly, a comfortable saddle is crucial. Your seat should support you without causing discomfort on longer rides.

    Must-Know Bike Helmet Safety

    Helmet safety is not just a suggestion. It’s a rule. Make sure your helmet fits snugly and is adjusted correctly. A helmet that’s too loose won’t protect you effectively. Check out this discussion on cycling safety and fashion for more insights. Remember, a helmet that meets safety standards is non-negotiable. It could be the difference between a minor scrape and a serious injury.

    Expert Fitting and Consultation

    To truly make your ride your own, consider getting expert advice. A fitting tailored to you can make a world of difference.

    Custom Bike Fitting Tips

    Custom fitting ensures your bike is perfectly suited to your body. This can reduce discomfort and improve efficiency. Make sure your saddle height and handlebar reach are adjusted to your measurements. This isn’t a one-size-fits-all situation. A proper fit can prevent injuries and make your rides more enjoyable.

    Virtual Bike Consultation Perks

    In today’s digital world, you can get expert advice without leaving your home. Virtual consultations provide personalized recommendations and solutions. They are convenient and flexible, perfect for busy schedules. Why not get expert advice right from your living room?

    Book a Wheel Sports Fitting 🚴‍♂️✨

    If you’re ready to level up your cycling game, consider booking a fitting with Wheel Sports. The longer you wait, the more discomfort you’ll feel. Our experts are ready to help you find the perfect fit and gear for your needs. You’ll experience increased comfort and performance, making every ride better than the last.

    Frequently Asked Questions

    What are the essential cycling accessories?

    The essentials include a helmet, lights, a lock, a repair kit, and a hydration pack. These items ensure safety, security, and comfort on every ride.

    How do I choose the right bike helmet?

    Select a helmet that fits snugly, meets safety standards, and suits your cycling style. Proper adjustment is key to ensuring it provides maximum protection.

    Why is custom bike fitting important?

    Custom fitting aligns your bike with your body, enhancing comfort and efficiency. It reduces the risk of injury and makes your riding experience more enjoyable.

  • Flat Tire? Fix It Fast + Grab the Gear You Need

    Flat tires don’t wait for a good time—they pop up right when you least want them to. If you’ve ever stood by your bike wondering how to fix a bike flat tire fast, you’re not alone. Let’s get you rolling again in minutes with simple steps and the must-have gear that makes every repair a breeze. Ready to grab your patch kit and pump? Your next ride awaits!

    Quick Flat Fix Steps

    Even the most seasoned cyclists face flat tires. Here’s how to get back on track quickly and confidently.

    Gather Essential Tools

    The right tools make all the difference in fixing a flat. First, you’ll need a tire lever, often found in repair kits. This tool helps pry the tire off the rim with ease. Next, a patch kit or spare tube is necessary to seal the puncture. A mini pump or CO2 inflator will help reinflate the tire. You can find these essential items in most cycling stores or online.

    Having these tools handy can save you time and frustration. It’s a good idea to keep them in your bike bag or backpack. No more walking your bike home after a flat!

    Remove The Wheel

    Removing the wheel is the next step in repairing your tire. First, if your bike has quick-release levers, simply open them to remove the wheel. For bikes with nuts, you’ll need a wrench to loosen them. Once the wheel is off, you can access the tube.

    Lay the wheel down flat. Use the tire lever to gently lift one side of the tire off the rim. This gives you access to the tube inside. Take care not to damage the tube further during this process. With practice, this becomes second nature.

    Patch or Replace Tube

    Deciding whether to patch or replace the tube depends on the size of the damage. Small punctures can be patched using a patch kit. Simply rough up the area, apply glue, and press the patch on. For larger holes or multiple punctures, replacing the tube might be the best option.

    If you choose to replace the tube, ensure the new tube is the correct size for your tire. Once patched or replaced, fit the tube back inside the tire. Use the tire lever to reseat the tire on the rim.

    Essential Gear for Cyclists

    Being prepared means having the right gear on hand. Let’s explore what every cyclist should pack.

    Tire Levers and Patch Kit

    Tire levers are small but mighty tools. They make removing the tire from the rim much simpler. Always carry at least two, as some tires are more stubborn than others. A patch kit is equally crucial. It allows you to fix punctures on the spot, saving you from a long walk home.

    Patch kits typically include rubber patches, glue, and a small piece of sandpaper. These items are compact and fit easily in a saddle bag. Make sure to check your patch kit regularly to ensure it’s complete and the glue is still usable.

    Mini Pump and CO2 Inflator

    A mini pump is a cyclist’s best friend on the road. It’s portable and can get your tire back up to pressure. CO2 inflators offer a faster solution by releasing a burst of compressed air. Both options are effective, so choose based on your preference.

    For longer rides, some cyclists carry both a mini pump and CO2 cartridges. This way, you have a backup if one fails. Having the ability to reinflate your tire quickly means less downtime and more riding.

    Get Rolling with Our Bundle

    Imagine never worrying about flats again. Our bundle has you covered!

    Flat-Fix Bundle Benefits

    Our Flat-Fix Bundle includes everything you need: tire levers, a patch kit, a mini pump, and CO2 inflator. This bundle is perfect for cyclists of all levels. No more scrambling to find missing tools or worrying about flat tires.

    Investing in a bundle ensures you’re always prepared. Having the right equipment boosts your confidence and keeps your rides smooth. It’s like having a personal bike mechanic in your backpack.

    Shop and Ride Today! 🚴‍♂️

    Ready to gear up? Head over to Wheel Sports and grab your Flat-Fix Bundle now. The longer you wait, the more likely you’ll find yourself stranded with a flat. Enjoy seamless rides and peace of mind knowing you’re fully equipped. Adventure awaits!

    Frequently Asked Questions

    How do I know if I should patch or replace the tube?

    If the puncture is small, patching is quick and effective. For larger holes or multiple punctures, replacing the tube is recommended.

    What should I do if I don’t have a patch kit?

    Without a patch kit, you can try using a temporary fix like wrapping the tube with tape or finding a nearby bike shop.

    Why do I need a mini pump if I have a CO2 inflator?

    A mini pump serves as a backup in case CO2 cartridges run out. It’s also useful for adjusting tire pressure during rides.

    How often should I check my bike’s tire pressure?

    Check your tire pressure at least once a week or before long rides. Proper pressure ensures a smoother ride and prevents flats.

    What’s the difference between a mini pump and a floor pump?

    A mini pump is portable for on-the-go use, while a floor pump is larger, providing quicker inflation at home.